


AL™ Series Lamp & Housing for The BenQ SH915 Projector - 90 Day Warranty
18 In Stock! Same Day Shipping Through 3PM CST! Need more? Call today @ 888.391.5596You are viewing a brand new lamp module designed for your projector.
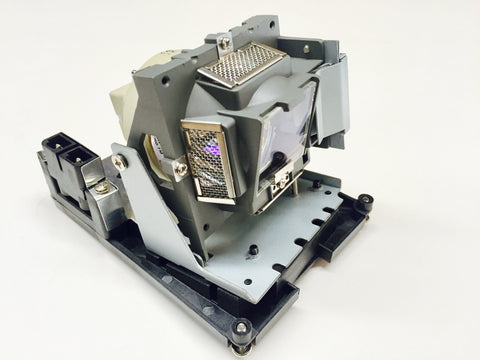
The SH915-LAMP-A replacement projector lamp & housing module is an aftermarket replacement part for select BenQ projectors. It has an Advanced Lamps™ Lamp Inside.
Aftermarket Bulb - Click here to learn more
- Important Specs
- 310 Watts
(Please mouse over for detail)
Lamp Specifications |
|
|---|---|
| Specifications | Data |
| Product Code | SH915 |
| Part Type | Lamp and Housing |
| Warranty | 90 Days |
| Condition | New |
| Lamp Type | Genuine AL™ Series |
| Discounts Available | Volume, Educational, Wholesale Accounts |
The SH915-LAMP-A replacement projector lamp & housing module is designed to replace bulbs in many BenQ projectors.
Included with every Genuine Advanced Lamps™ projector lamp module that we sell is our 90 Day Guarantee backed by our team of knowledgable service technicians with over 25 years of hands on experience in the projector field. If you order a projector lamp from Jaspertronics™ and you are not satisfied for any reason, you can send back the projector lamp for refund or exchange.

While we are working to ensure each image we have posted is accurate, there may be items with an incorrect or missing image. Please be sure you are ordering the correct model.

We Also Recommend
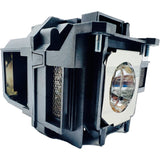
AL™ Series ELP-LP88 Lamp & Housing for Epson Projectors - 90 Day Warranty
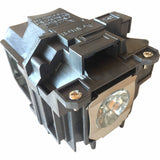
AL™ Series ELP-LP78 Lamp & Housing for Epson Projectors - 90 Day Warranty

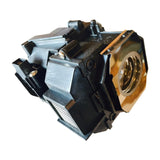
AL™ Series ELP-LP96 Lamp & Housing for Epson Projectors - 90 Day Warranty
AL™ Series ELP-LP49 Lamp & Housing for Epson Projectors - 90 Day Warranty

AL™ Series Lamp & Housing for The Optoma HD141X Projector - 90 Day Warranty
QUESTIONS & ANSWERS
Ask a Question-
Are there instructions with this lamp on how to replace the original lamp?
The instructions do not come with the lamp, however we have pasted the instructions that can be found on page of your projectors manual: 1. Turn the power off and disconnect the projector from the wall socket. If the lamp is hot, avoid burns by waiting for approximately 45 minutes until the lamp has cooled. 2. Loosen the captive screw from the left side. 3. Remove the lamp compartment cover 4. Loosen the three captive screws that secure the lamp. • Do not turn the power on with the lamp cover removed.
• Do not insert your fingers between the lamp and the projector. The sharp edges inside the projector may cause injuries 5. Lift the handle so that it stands up. Use the handle to slowly pull the lamp out of the projector. • Pulling it too quickly may cause the lamp to break and scatter broken glass in the projector.
• Do not place the lamp in locations where water might splash on it, children can reach it, or near flammable materials.
• Do not insert your hands into the projector after the lamp is removed. If you touch the optical components inside, it could cause color unevenness and distortion of the projected images. 6. Insert the new lamp into the lamp compartment and make sure it fits in the projector. • Ensure the connectors are aligned.
• If you experience resistance, lift the lamp and start again. 7. Tighten the screws that secure the lamp. 8. Ensure the handle is fully laid flat and locked in place. • Loose screw may cause a bad connection, which could result in malfunction.
• Do not over tighten the screw. 9. Replace the lamp compartment cover on the projector and tighten the captive screw. 10. Restart the projector. Do not turn the power on with the lamp cover removed. 11. After the startup logo, open the On-Screen Display (OSD) menu. Go to the SYSTEM SETUP: Advanced > Lamp Settings menu. Press MODE/ENTER. The Lamp Settings page displays. Highlight Reset lamp timer. A warning message displays asking if you want to reset the lamp timer. Highlight Yes and press MODE/ENTER. The lamp time will be reset to '0'. Thank you for checking with Jaspertronics for your projection lighting needs!