Re-Aligning an LMP-H220 Bulb in Housing
Posted by Dalton Ikenberry at
The Sony LMP-H220. Whether you are repairing a loose bulb or replacing your old bulb with a new one in your existing housing, you are in the right place!
This is a quick process that can easily be completed by anyone with light mechanical ability.
This is a quick process that can easily be completed by anyone with light mechanical ability.
First and foremost, always wear gloves when handling a bare bulb. The oils on our hands (even if they are the cleanest of cleans!) will leave residue on the bulb. While that bulb is working it reaches extreme temperatures. That residue creates a hotspot that can cause the bulbs cup to crack, rendering it inoperable.
Onto the process: First, we need to take the back of the housing off to expose the bulb. This can be done by removing screws from the 3 posts show below:

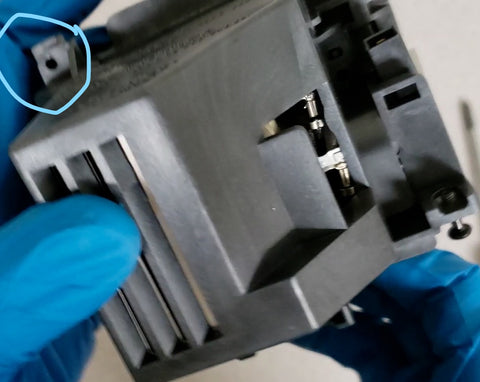

After removing these three screws the rear of the housing will be free to remove.
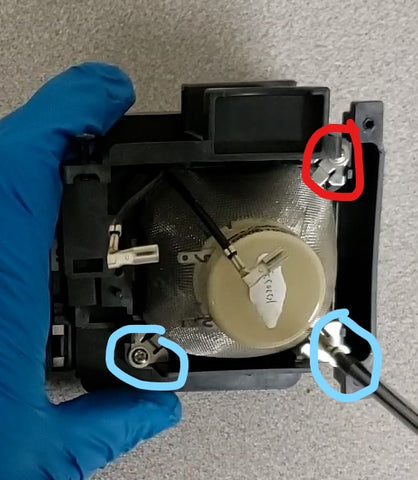
You should now see the exposed bulb and its three retaining clips. Remove those retaining clips by removing the screws that secure them. These screws are circled in the image below. Please note the clip circled in red. This clip is slightly larger than the other two and must be returned to this same position for a proper and secure fit. To make this an easier process for you, do not remove the two smaller clips completely, only remove the larger of the three clips (circled in red). Simply back out the screws to a point that they are still attached, but also so the clip is loose enough to spin around the screw freely:
Now that those clips have been removed and/or loosened, you are free to realign or remove the spent bulb (depending on which process you are working to accomplish!). If you are replacing the bulb remove the two wire leads and discard the bulb according to your local disposal requirements (there is a small amount of mercury sealed inside!). Install the new bulb by first attaching the wire leads and then seating the bulb fully and flushly into the housing just as the last bulb was. If you are realigning, there is no need to remove the wires, simply realign!
Once the bulb has been aligned; reconnect and fasten the larger of the three clips. After that larger clip has been fastened, fasten the remaining two.
Now that the bulb is secured in the housing you can reattach the rear of the housing and secure it with the same three screws you removed earlier. This will complete your repair!
Thank you for checking out our blog on how to refit a Sony LMP-H220 housing with a new bulb (or how to realign your existing bulb!)
Please also refer to our video on this process: https://youtu.be/k6IhKH2nXJE
Share this post
0 comments
 CENTRALLY LOCATED SHIPPING FROM MISSOURI, USA!